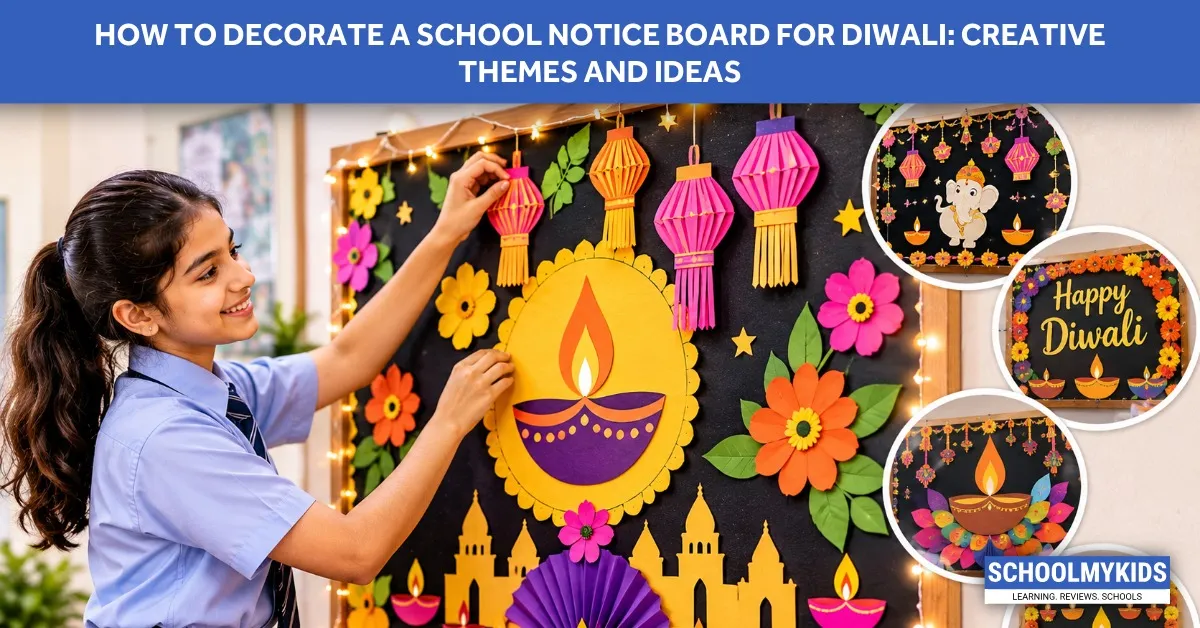
The notice board outside your classroom is empty. It has been empty since the summer vacation. And now the teacher has looked at you and said, “You’re creative, na? Do something for Diwali.”
That is how it starts.
In 2026, Diwali is on Sunday, November 8. That is your deadline. You have maybe three free periods, a pair of blunt scissors, and a budget that is basically whatever the class fund has left after the teacher's farewell party. The Pinterest boards you saw last night had fairy lights and laser-cut wooden diyas. You have chart paper.
Good news. You do not need the fairy lights. You need a board that looks like students made it. That is a lower bar than you think.
Before You Touch the Board, Check Three Things
Can you use pins on the board, or does the school only allow tape? Some boards have a glass front. Some have soft board that eats pins. Ask the office.
Can you keep the decoration up till the holiday? Or does it come down the same evening? This decides how much effort goes into the 3D stuff.
And who is actually helping? If it is just you and one friend, pick five crafts from this list. Not ten. If it is a group of eight, split the board into sections and give each pair one section.
One safety note. No candles or open flames near the board. Paper and cardboard catch fire faster than you think. Use only non-toxic glue and paint, especially if younger classes are helping. Count every pin before and after. A pin left on the floor is a foot injury waiting to happen. Keep scissors pointed down and away from faces when younger students are around.
The Layout: Think in Zones, Not One Flat Wall
Think of the board in four zones. Not one flat wall of stuff.
Zone | What goes here | Why |
Top strip | Bunting, a banner, or a row of small hanging diyas | Frames the board. Tells people what it is. |
Border (all four sides) | Toran strips, paper chains, or a simple painted border | Cheap. Covers the ugly wooden frame. |
Centre | One big craft. A large diya, a rangoli circle, a paper lantern | This is the thing people look at first. Make it big. |
Around the centre | Smaller crafts, handprints, written wishes on paper strips | Fills the gap. Lets more students contribute. |
Do not fill every inch. Empty space is fine. A board that is 70% full looks intentional. A board that is 100% full looks like a craft shop exploded.
10 Crafts You Can Actually Finish
1. Paper Plate Diya
Coat a paper plate in orange or yellow paint. Set it aside until completely dry. Cut a flame shape from yellow paper and glue it to the top edge. Add a small red circle below the flame for the wick. Attach the whole thing to the board with double-sided tape.
The problem: The plate is curved, so tape does not grip the middle. Press the plate flat under a heavy book for an hour before sticking it. And paint takes longer to dry than you think. Paint in the morning, stick in the afternoon.
2. Rocking Paper Diya
Cut a diya shape from card stock. Fold a small strip of paper into a triangle and stick it behind the diya so the whole thing stands out from the board slightly. Not flat. A little 3D.
The classic error: The triangle collapses under the weight of the card. Use thicker card for the diya, or double the triangle strip. Test one before making twenty.
3. Paper Lantern (Kandil)
Start with a rectangle of chart paper. Fold it in half the long way. Starting from the crease, cut slits that stop before you reach the far edge. Leave a margin uncut. That margin becomes the hinge. Open it out, roll it into a tube, and secure the two short ends together. Add a thread handle at the top.
Watch out for this: Someone cuts all the way through and the paper falls into strips. Mark the stopping line with a pencil and ruler first. Cut to the line, not past it. Also, thin chart paper flops. Use card stock or two sheets stuck together.
4. Newspaper Toran
Cut newspaper into thin wedge shapes. Begin at the broad end and wind the paper around a pencil. Keep the roll firm. Secure the pointed end with a dab of glue and slip the pencil out. Thread the finished beads onto a string and hang it across the top of the board.
This always happens: The first roll is loose and unrolls by evening. Roll tighter. Hold the glued tip for ten seconds. If it still unrolls, wrap a tiny piece of cellophane tape around the middle.
5. Paper Cup Diya
Take a paper cup. Cut it down to half its height. Paint it. Turn it upside down and stick it to the board. Add a paper flame on top.
The usual issue: The cup is too heavy for tape. Use a glue gun if the school has one, or make a small cardboard backing and stick that to the board instead of the cup directly.
6. Handprint Rangoli
Draw a large circle on a chart paper. Every student dips a hand in paint and presses it around the circle, fingers pointing outward. Different colours. The overlapping handprints make a rangoli pattern.
The messy part: Paint on hands gets everywhere. Keep a bucket of water and an old towel nearby. And do this on the floor, not on the board. Let the chart paper dry flat before you pin it up.
7. Paper Chain Bunting
Cut strips of coloured paper. Loop one strip into a circle, stick the ends. Thread the next strip through and loop it. Repeat. Make four chains and hang them across the top.
What goes wrong: The loops are too big or too small and the chain looks uneven. Cut a template strip from scrap paper first. Use that as your size guide for every strip.
8. Origami Lotus
Fold a square of paper into a lotus. There are a dozen tutorials online. Stick the finished lotus on the board with a small piece of tape behind the centre.
What goes wrong: The folds are not sharp and the lotus looks like a crumpled ball. Run a ruler edge along every fold to crease it properly. And use thin paper, not card. Card does not fold neatly.
9. Diya Garland
Cut small diya shapes from coloured paper. Stick them on a long thread, spacing them evenly. Hang the garland vertically on one side of the board.
What goes wrong: The diyas slide down the thread. Put a tiny dot of glue on the back of each diya where the thread passes through. Or tie a small knot in the thread between each diya.
10. Wish Strips
Cut coloured paper into strips. Every student writes one Diwali wish or one sentence about what the festival means to them. Stick the strips around the centre craft, overlapping slightly.
What goes wrong: The handwriting is all different sizes and it looks messy. That is the point. Do not ask everyone to write in the same size. The mess is the proof that real students made it.
Oops Moments and What to Do
The tape will not stick to the wall. Cheap masking tape fails on painted walls. Use double-sided foam tape for anything heavier than a sheet of paper. Test one corner the day before.
Someone’s craft tears. Keep cellophane tape in the box. A tear at the edge can be taped from behind. Nobody sees it from a distance. A tear through the middle: redo it.
The border is too short. This happens every time. Measure the board before you cut anything. Write the measurement on your hand. And add ten extra centimetres to whatever you cut.
The colours clash. Orange, yellow, and red are safe. Add one dark colour, like deep blue or green, to stop it looking like a fire. Do not use five bright colours. Three is enough.
Nobody wants to help on the last day. Do the big craft first. The one in the centre. If everything else fails, at least the centre looks finished.
The Material List You Can Screenshot
Item | Quantity | Note |
Chart paper (assorted) | 10 sheets | Get two thick ones for lanterns |
Card stock | 5 sheets | For anything that needs to stand up |
Paper plates | 10 | The cheap ones, not the coated ones |
Paper cups | 10 | Small ones |
Old newspapers | A stack | Free from the staff room |
Glue sticks | 4 | They run out fast |
White glue (Fevicol) | 1 bottle | For strong joints only |
Scissors | 6 pairs | More than you think |
Double-sided tape | 2 rolls | For the board |
Cellophane tape | 2 rolls | For tears and quick fixes |
Thread | 1 roll | White or gold |
Acrylic paint | 3 colours | Orange, yellow, red |
Paint brushes | 4 | Thin ones for details |
Sketch pens | A few | Black and orange go first |
A ruler | 1 | For measuring the board and creasing folds |
One extra thing. A waste bag. Paint and paper scraps on the floor do not clean themselves up, and the peon will not be happy. Also keep a small first-aid box or at least a few plasters in the craft box. Cardboard edges and scissors occasionally nick fingers.
Conclusion
The board does not have to look like the ones on Pinterest. Those boards were made by adults with better paper and a glue gun. Yours will look like a group of students made it in three free periods.
That is the correct outcome.
Start with the centre craft. If nothing else gets done, the board still has something on it. And if someone tears a petal or the border is short, tape it from behind and move on. Nobody is grading this. They are just walking past it on the way to the assembly.







Be the first one to comment on this story.