Summer holidays are the perfect time for curious minds to explore the wonders—and sometimes the dangers—of our planet. One of the most popular holiday homework assignments is creating models of natural disasters. These projects not only make learning fun but also help us understand the science behind events like tsunamis, earthquakes, floods, and more. In this blog, we’ll guide you step-by-step in building simple yet impressive models and share pro tips to make your project stand out.
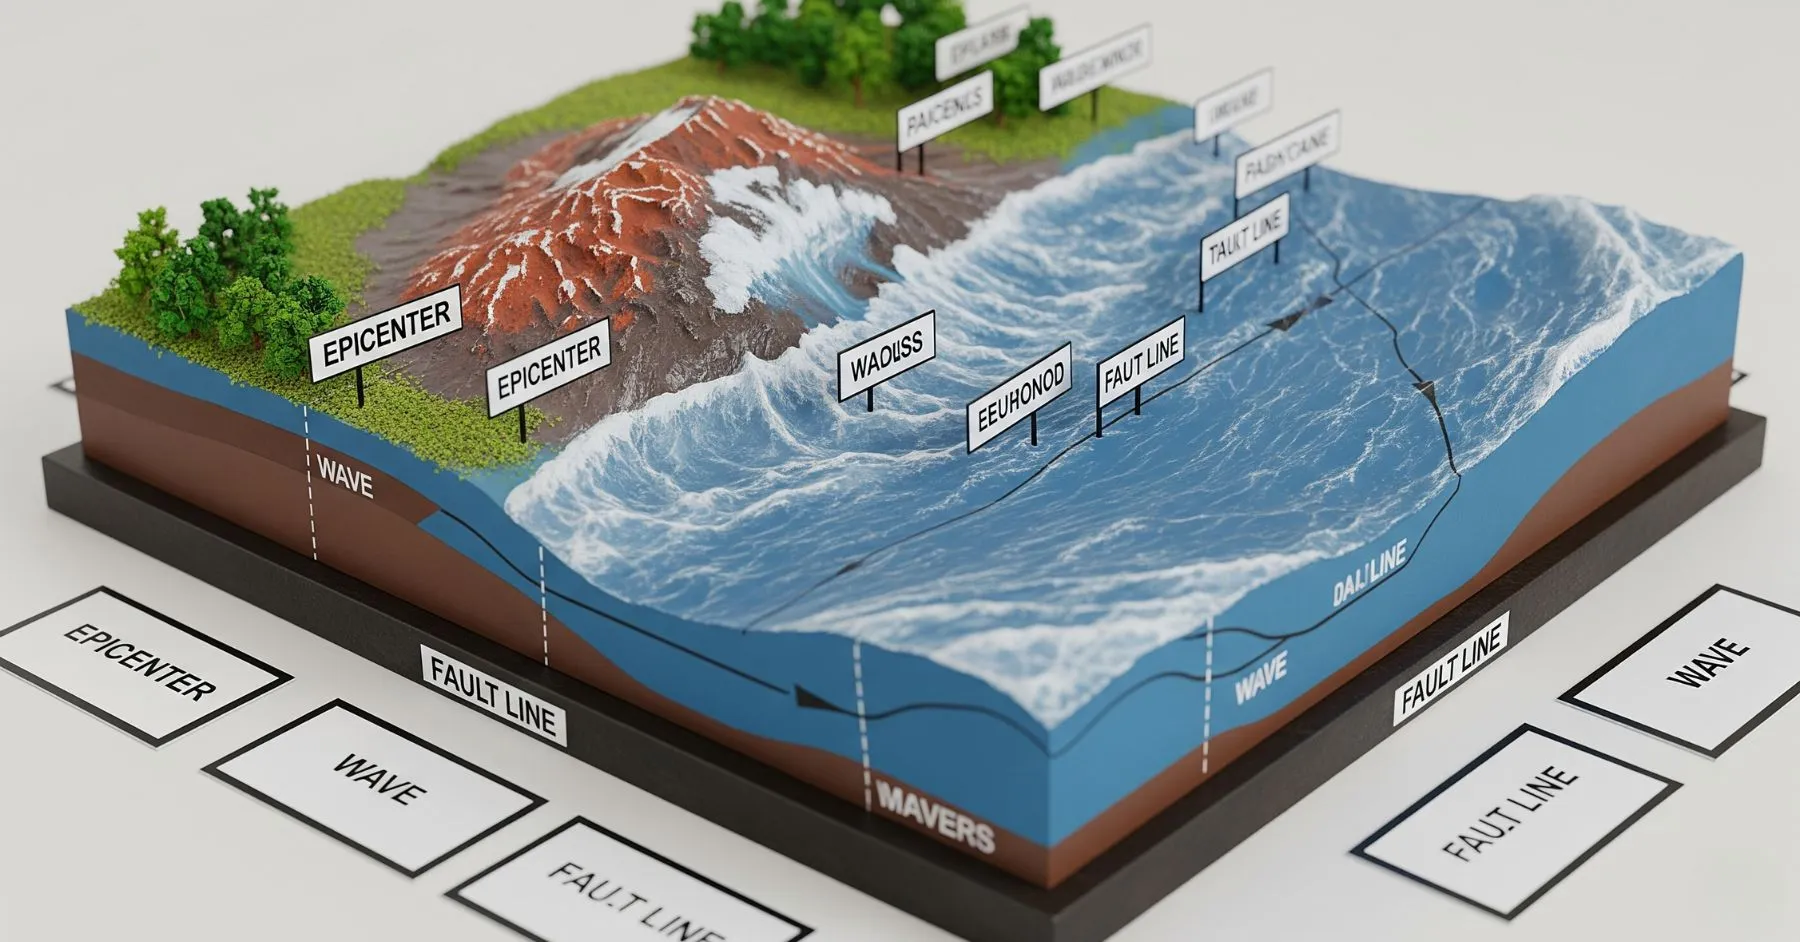
Tsunami Model
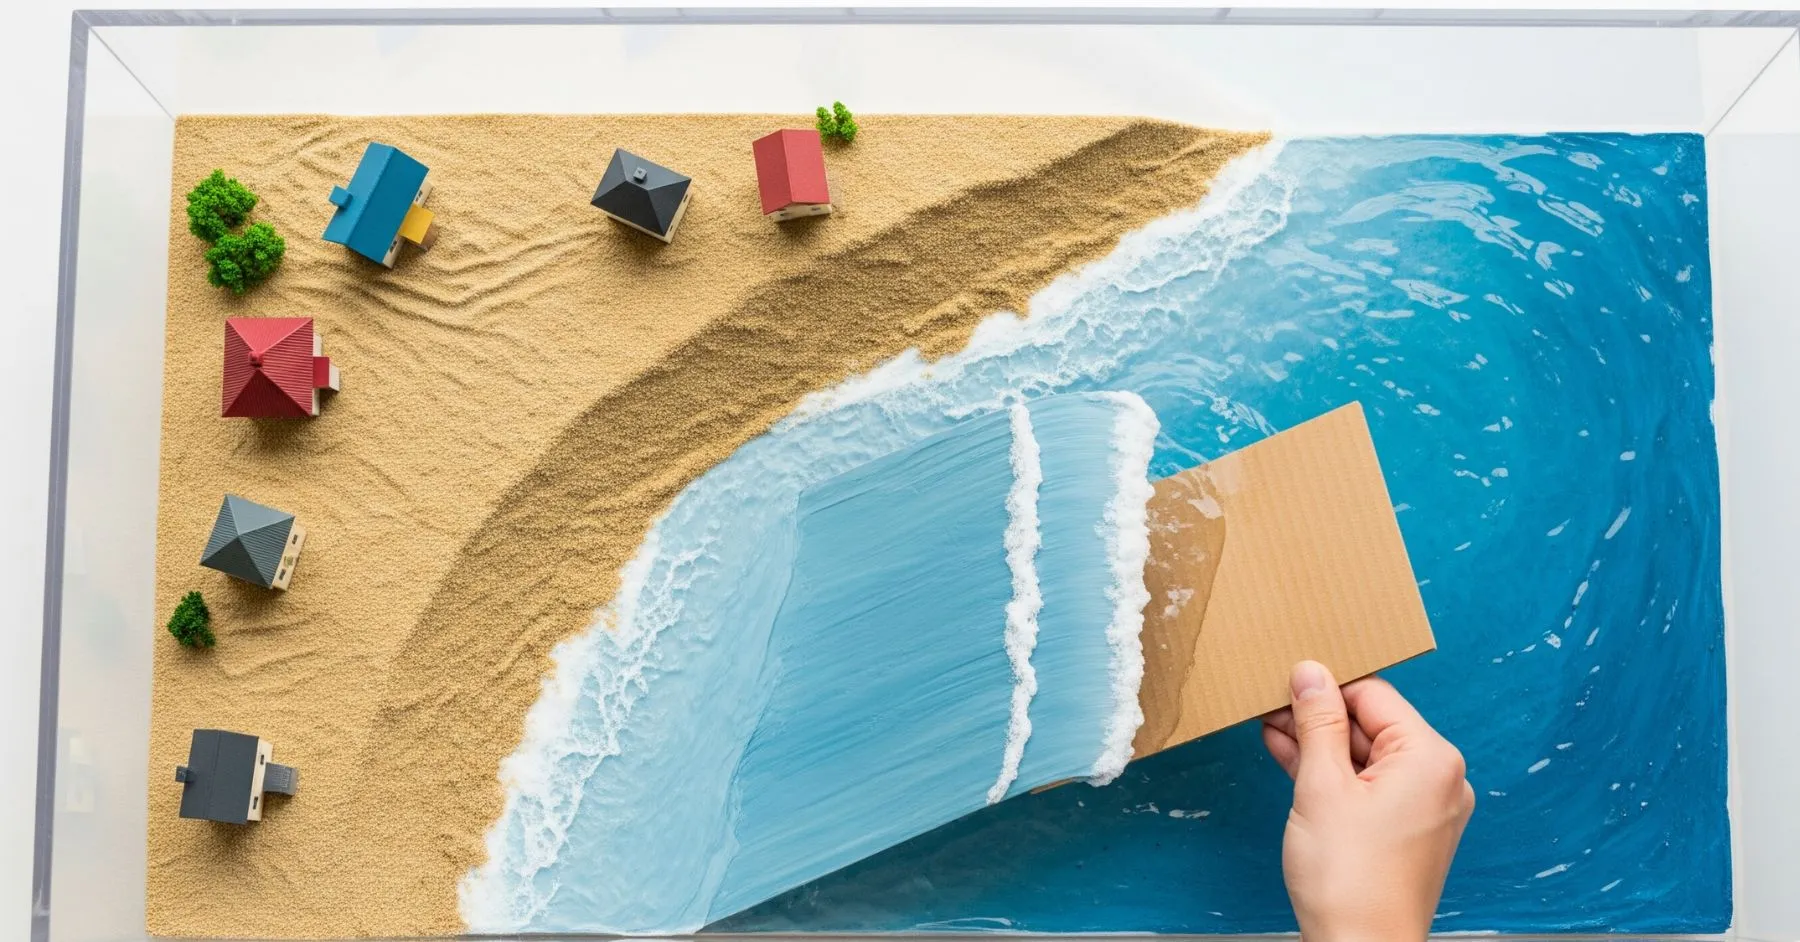
What You'll Need:
- Clear plastic container (aquarium or large Tupperware)
- Water
- Sand or small pebbles
- Small houses or boats
- A flat piece of wood or cardboard
- Blue food coloring (optional)
Step-by-Step Instructions:
- Create the Ocean Floor: Fill one end of your container with sand or pebbles to create a sloping "beach." This should take up about 1/3 of your container.
- Add Coastal Features: Place small toy houses or boats near the shoreline. These represent coastal communities.
- Fill with Water: Add water to the deeper end, leaving the "beach" partially dry. Add blue food coloring if you want it to look more ocean-like.
- Generate the Tsunami: Use your flat piece of wood as a "tectonic plate." Quickly push it up from the bottom of the deep end to displace water suddenly.
- Observe the Wave: Watch as the displaced water creates a wave that travels toward your model coastline!
Pro Tip: Try different speeds and angles with your "tectonic plate" to see how it affects the wave size and speed.
Earthquake Model
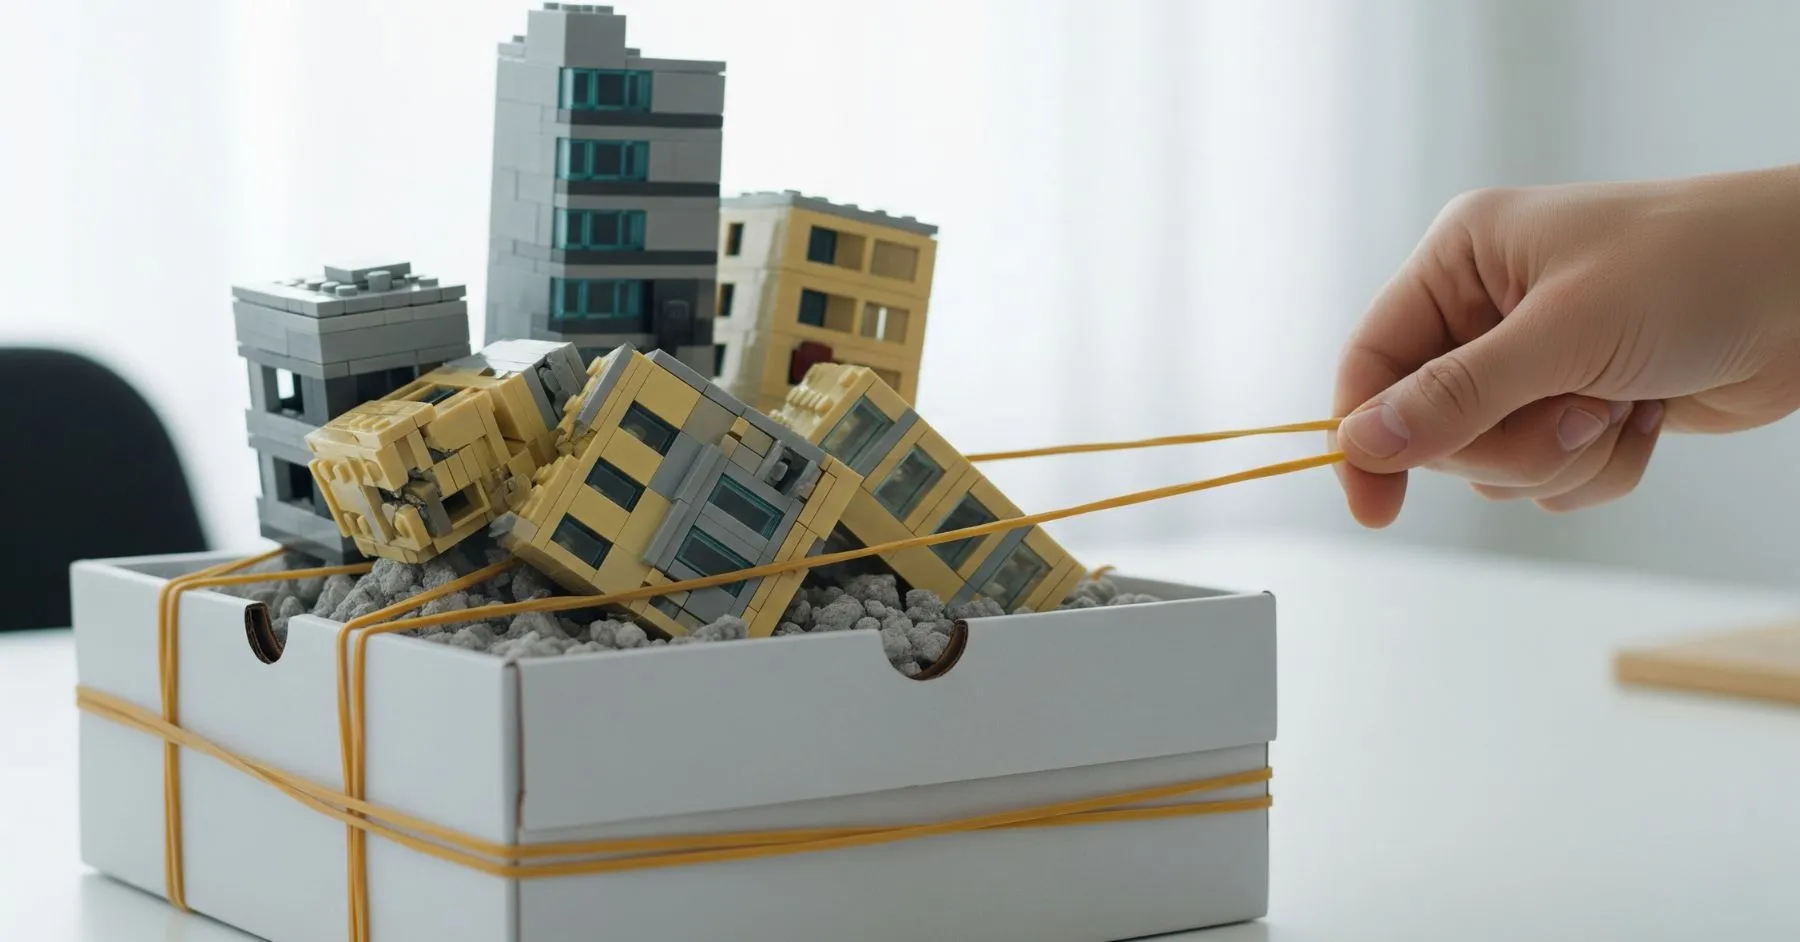
Materials Needed:
- Cardboard box (a shoe box works well)
- Rubber bands
- Small blocks (wood or LEGO)
- Scissors, glue, markers
Steps:
- Prepare the Base: Place the cardboard box upside down to serve as the ground.
- Build Structures: Use blocks or LEGO to make small buildings on top of the box.
- Simulate Shaking: Attach rubber bands to the sides of the box. Pull and release to simulate an earthquake’s tremors.
- Observe Effects: Watch how the buildings react—some may fall, showing how earthquakes can damage structures.
Pro Tips:
- Use different materials for buildings to compare which ones are more stable.
- Add a “fault line” by drawing a crack across the base.
Flood Model
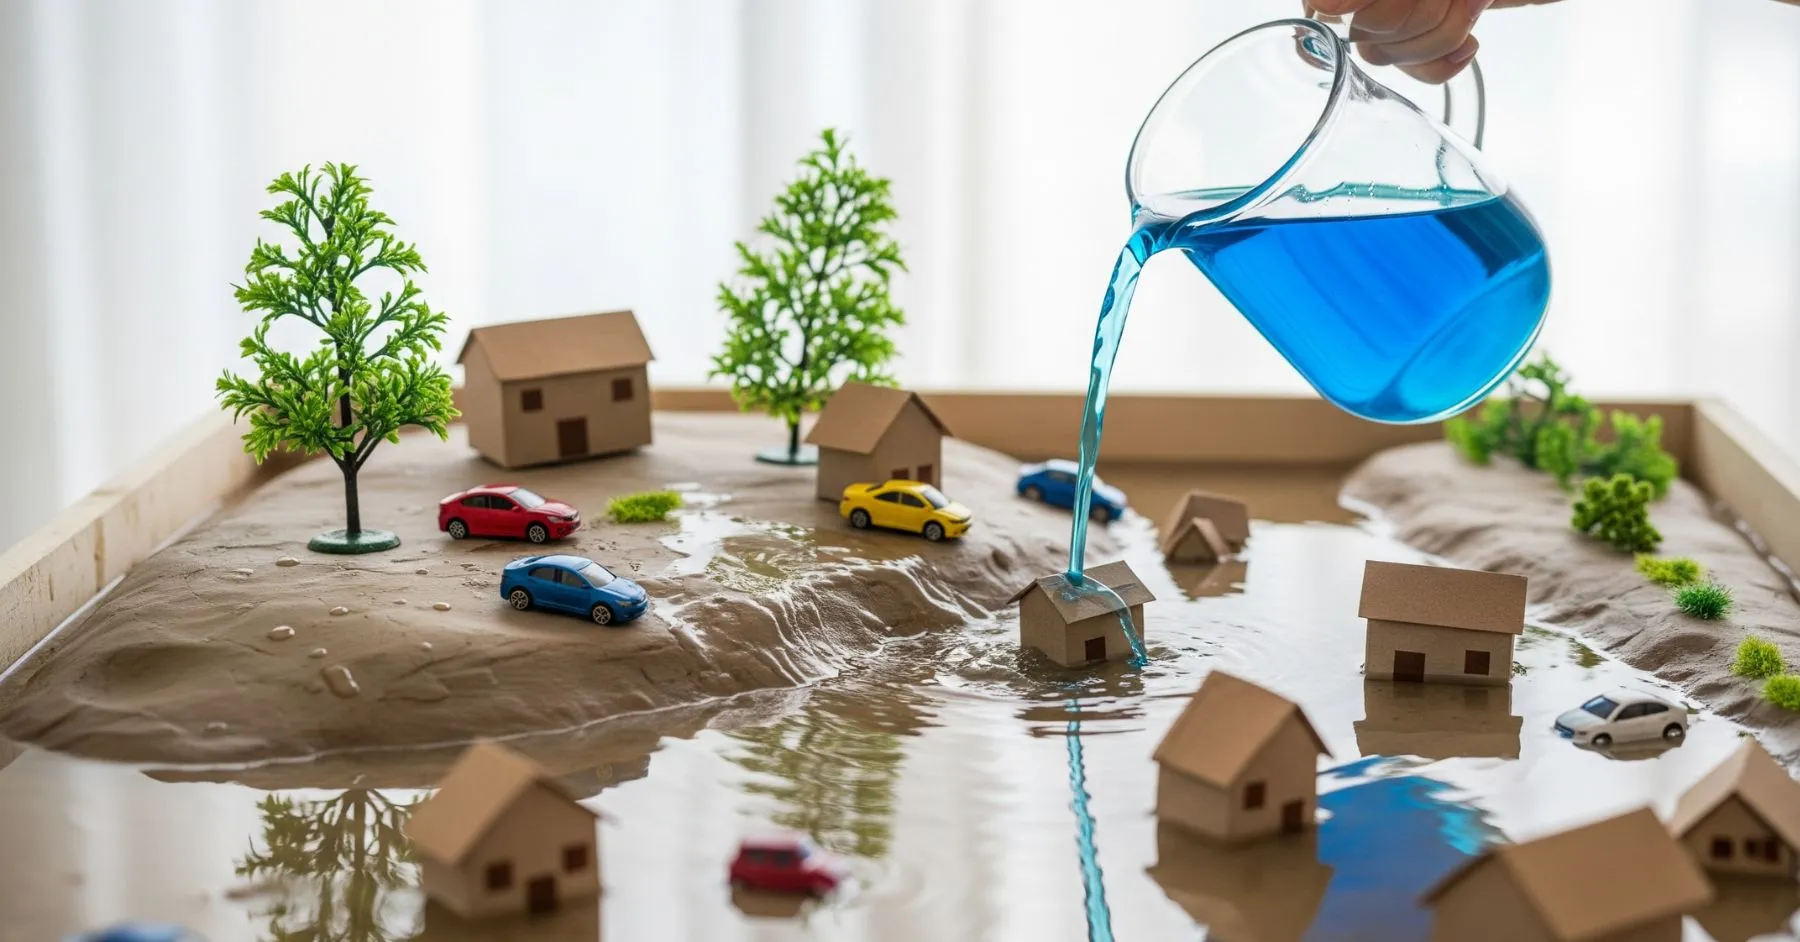
Materials Needed:
- Large tray or shallow tub
- Sand or clay (to create land)
- Small houses (from cardboard or clay)
- Water
- Blue food coloring (optional)
Steps:
- Shape the Land: Use sand or clay to form a raised area (land) and a lower area (river or sea) in the tray.
- Build Houses: Place small houses on the land.
- Create the Flood: Slowly pour water into the lower area and watch as it rises, flooding the land and houses.
- Observe: See how water spreads and affects different areas.
Pro Tips:
- Add trees and cars for detail.
- Use colored water for a dramatic effect.
- Show the impact of barriers (like tiny walls) to demonstrate flood prevention.
Making Your Models Stand Out
- Add Scientific Labels: Create small cards explaining the science behind each disaster. For earthquakes, explain tectonic plates. For tsunamis, discuss underwater earthquakes.
- Include Real Data: Research real disasters and include facts like "The 2004 Indian Ocean tsunami traveled at speeds up to 500 mph!"
- Create Before and After Scenes: Show the same area before and after the disaster strikes.
- Use Technology: Record slow-motion videos of your experiments to analyze the movement patterns.
Presentation Tips That Will Impress
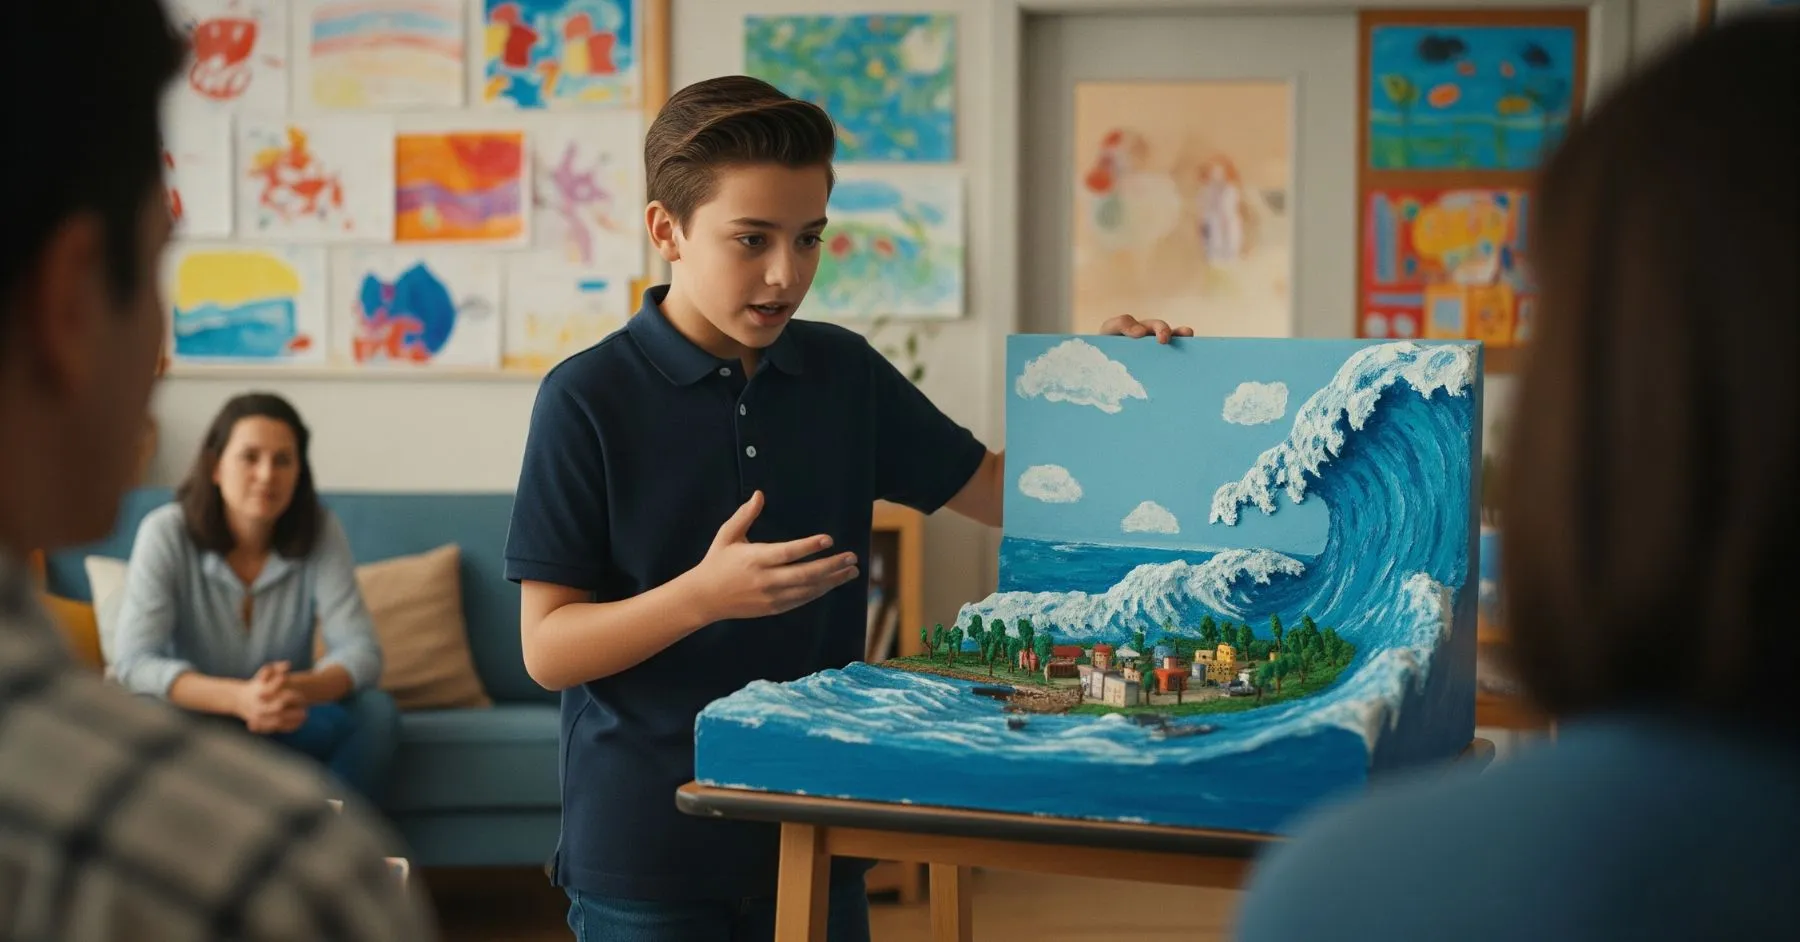
- Tell a Story: Don't just demonstrate – explain what's happening step by step. "As tectonic plates push against each other, pressure builds up until..."
- Engage Your Audience: Ask questions like "What do you think will happen when I add the water?"
- Connect to Real Life: Explain how understanding these models helps scientists predict real disasters and save lives.
- Practice Your Timing: Make sure you know exactly when to add each component for the best effect.
- Prepare for Questions: Teachers love asking "what if" questions. Think about variables you could change and their effects.
Conclusion
Building models of natural disasters is a fun and educational way to learn about Earth’s powerful phenomena. With simple materials and a bit of creativity, you can make a project that not only impresses your teachers but also helps everyone understand the importance of disaster preparedness. So, gather your supplies, follow these steps, and let your imagination guide you as you build and learn!


Be the first one to comment on this story.