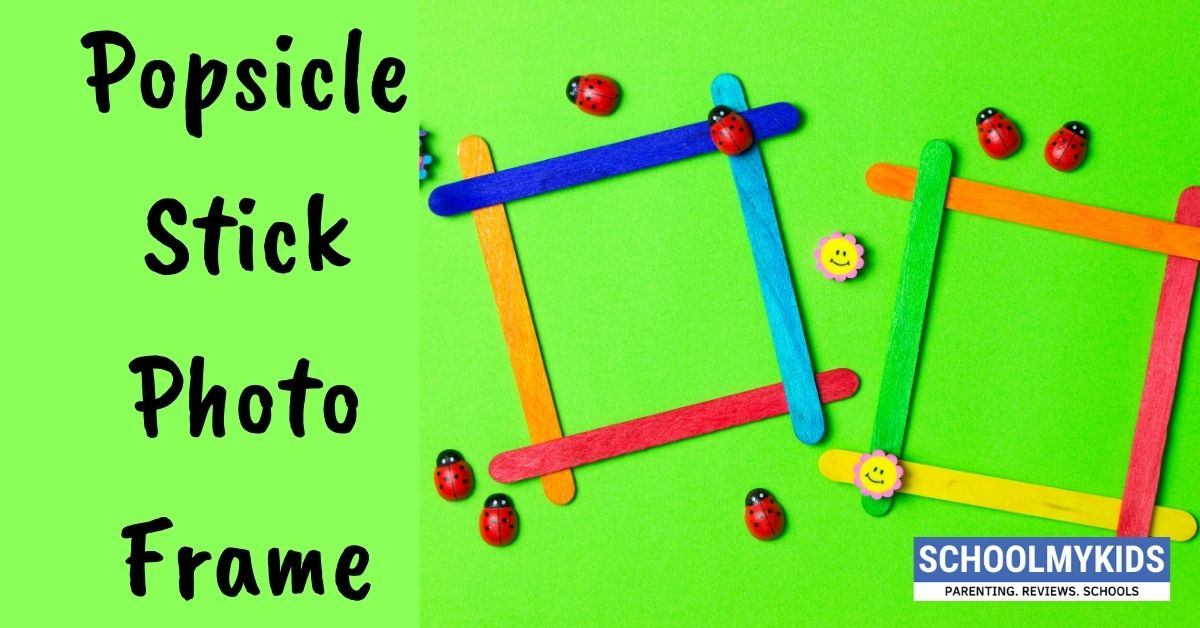
Hello children. We all love to cherish good memories. Many times we flip through old photo albums or click on the computer to refresh our long lost sweet memories. So to add more fun to this let’s create one beautiful yet creative photo frame using popsicle sticks to stick our favourite photos and adore it on our dressing tables or walls. Sounds interesting doesn’t it? It is even more exciting to create one!
Let’s learn how to make popsicle stick photo frame
Materials Required to make Popsicle Stick Photo Frame
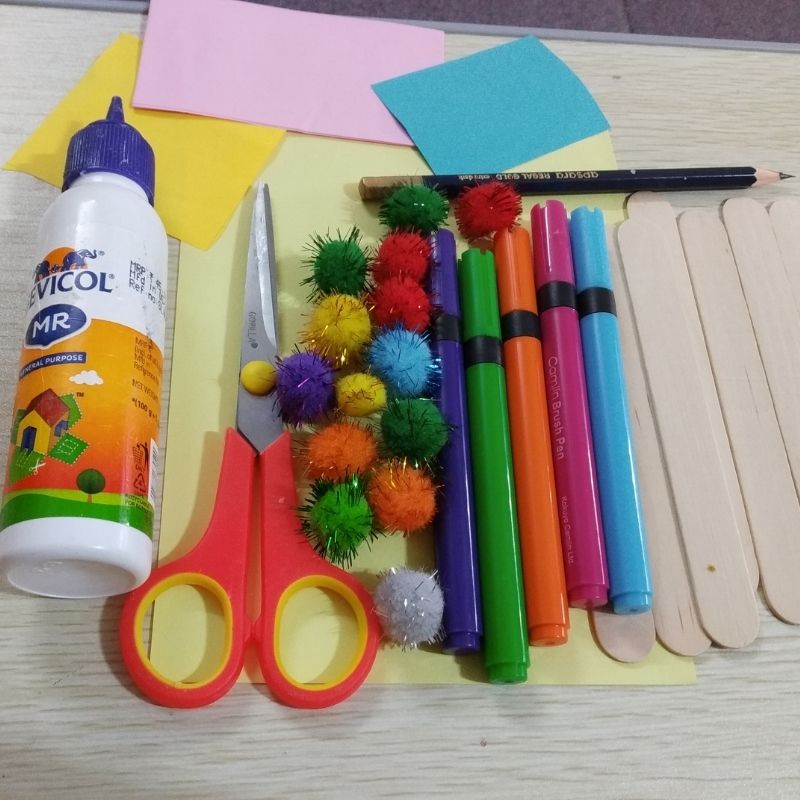
- Popsicle sticks
- Colourful papers
- Pencil
- Sketch pens
- Pompom balls
- Scissors
- Glue
How to make Popsicle Stick Photo Frame Step by Step
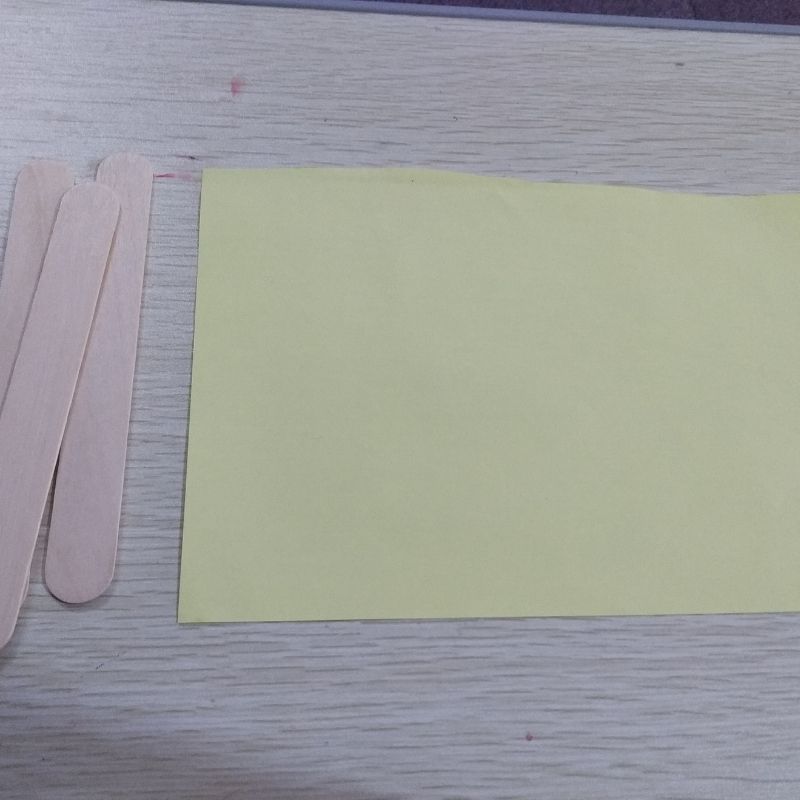
- Take a white or a yellow sheet and some popsicle sticks. The size of the paper should be half of A4 sheet.
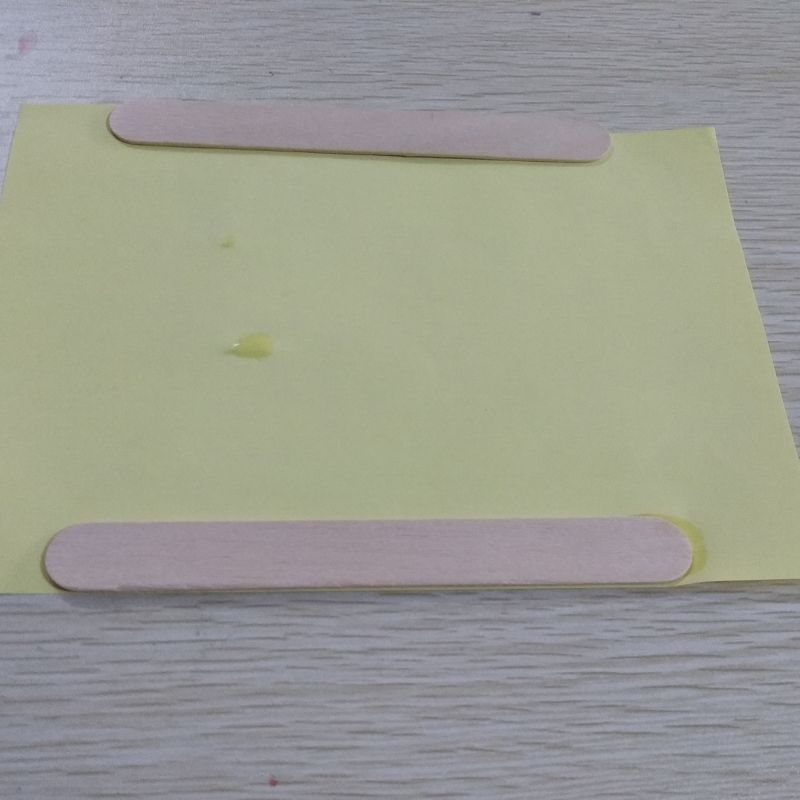
- Place the paper horizontally and stick two popsicle sticks horizontally one on the top and other at the bottom of the sheet.
- Once done, take another two popsicle sticks and stick them vertically on the ends of the two horizontally placed popsicle sticks on both sides.
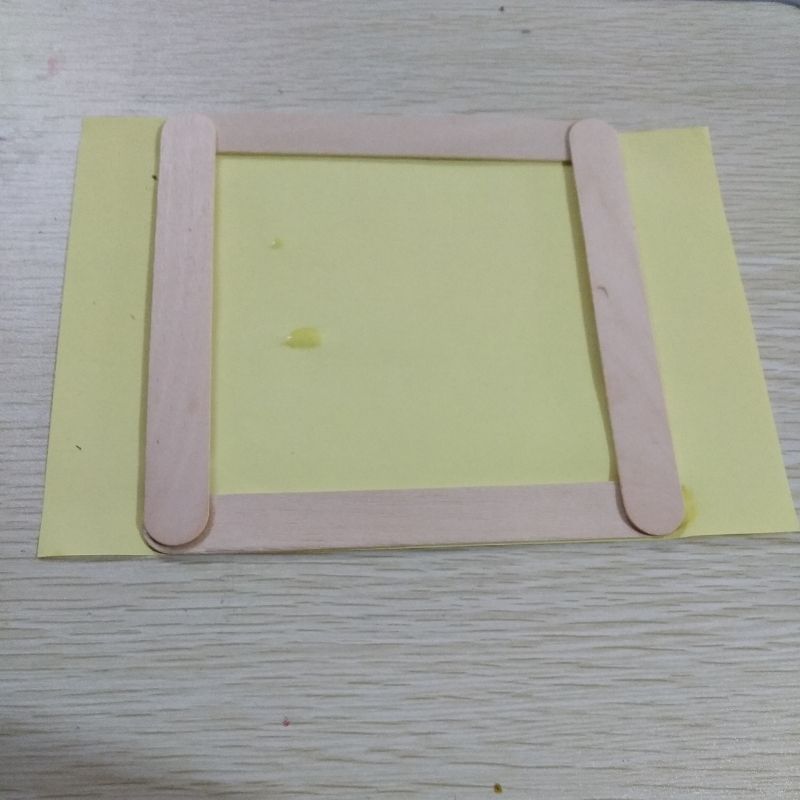
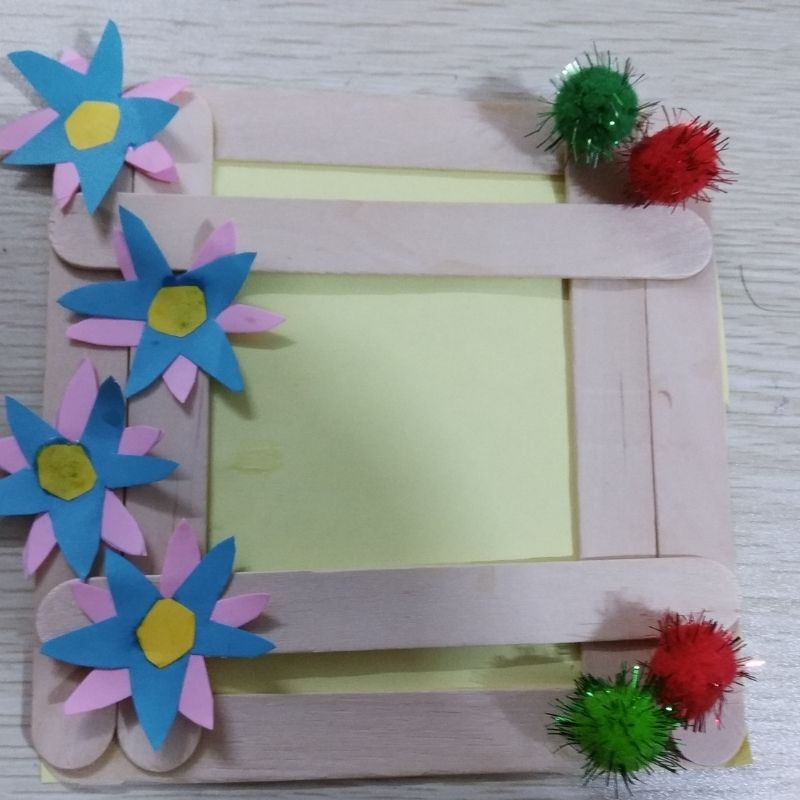
- After this, you will have a framework of four sticks in the form of a square.
- The yellow sheet or the white sheet over which we have stuck the popsicle sticks would serve as the base of the photo frame.
- Next, stick two more sticks vertically parallel to the first two vertical popsicle sticks on both sides.
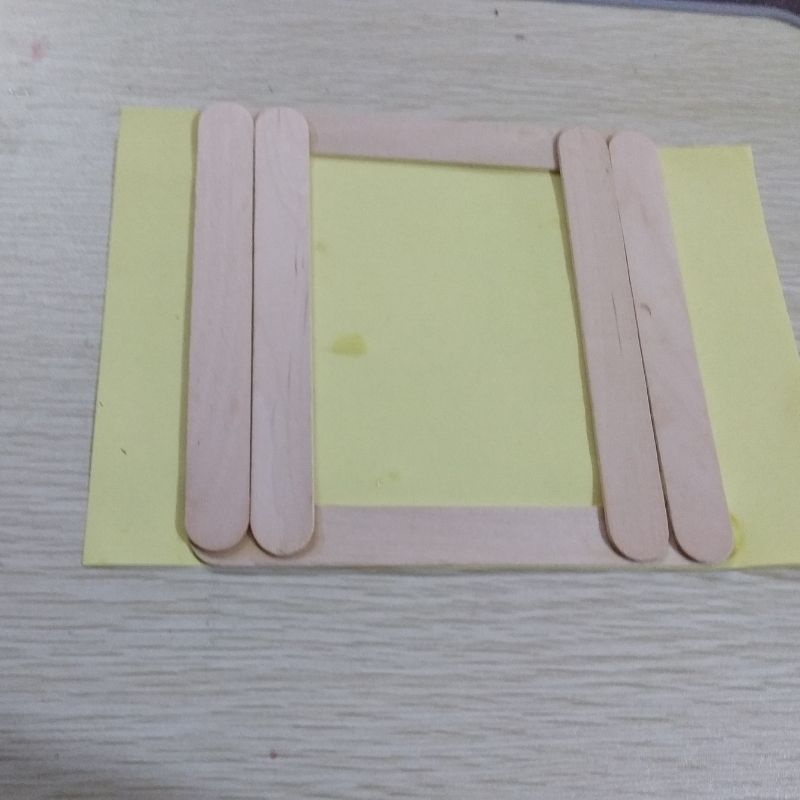
- Once done, stick two more popsicle sticks one on top and other at the bottom.over these two vertical sticks, below the initial framework.
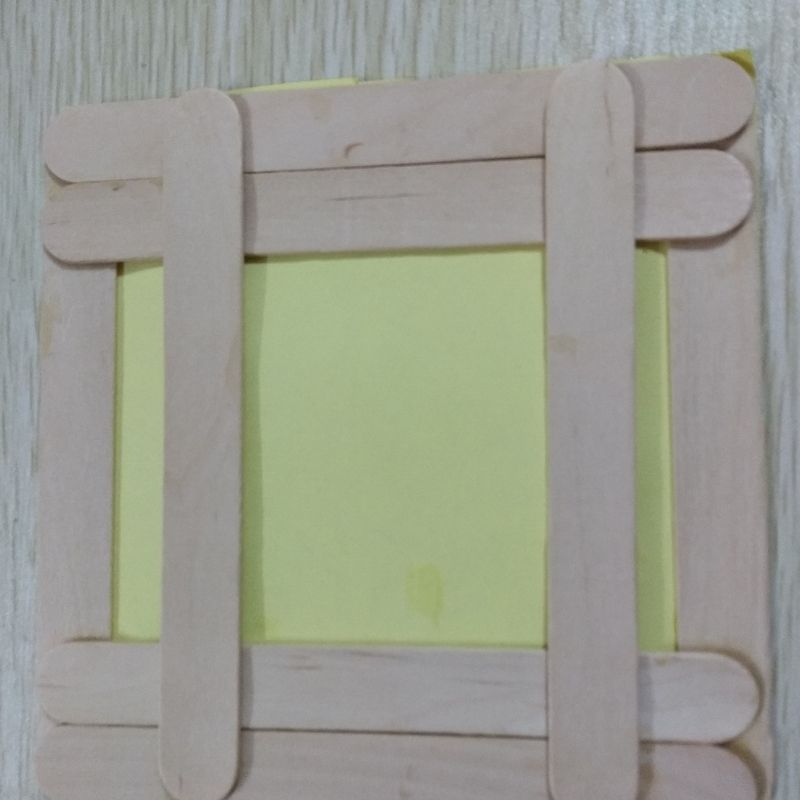
- So now you have the basic framework of photo frame ready with the base beneath.
- Cut the extra portions of the paper as per the extent of the popsicle sticks.
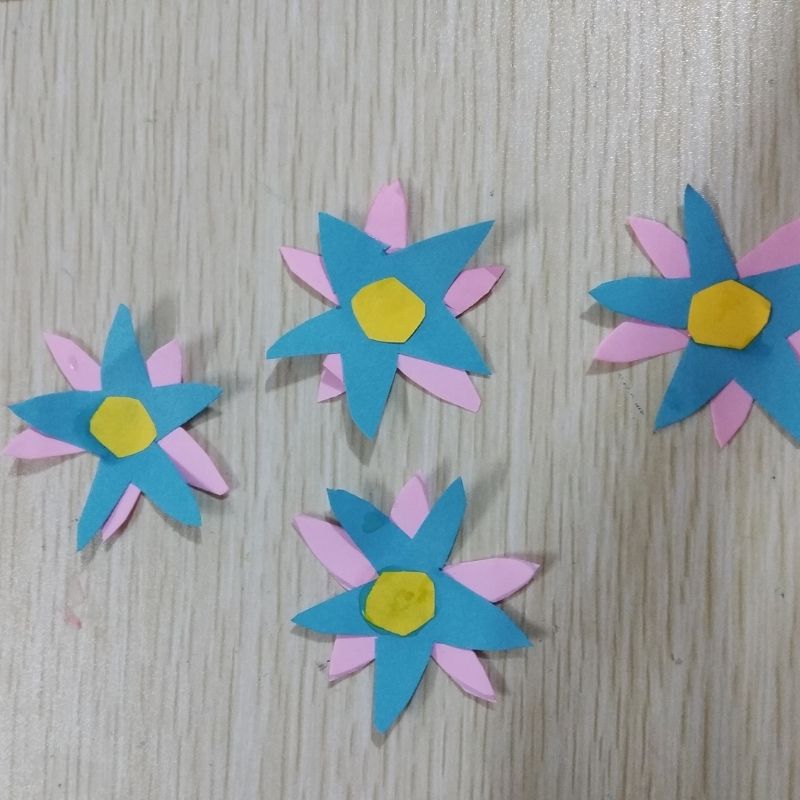
- Now cut 8 flowers of two different colours having 6 petals each. Each flower of colour should be 4 in number. Cut small 4 yellow circles to stick in the middle of the flowers
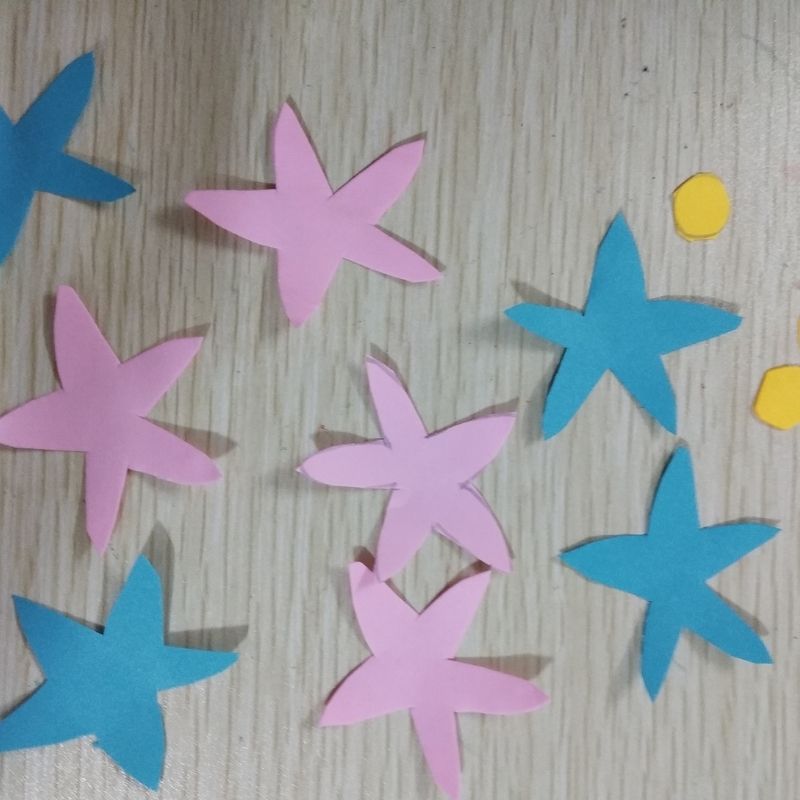
- Likewise stick one flower over the other in a cross pattern. You will have 4 flowers one over the other. Stick the yellow circle in the centre.
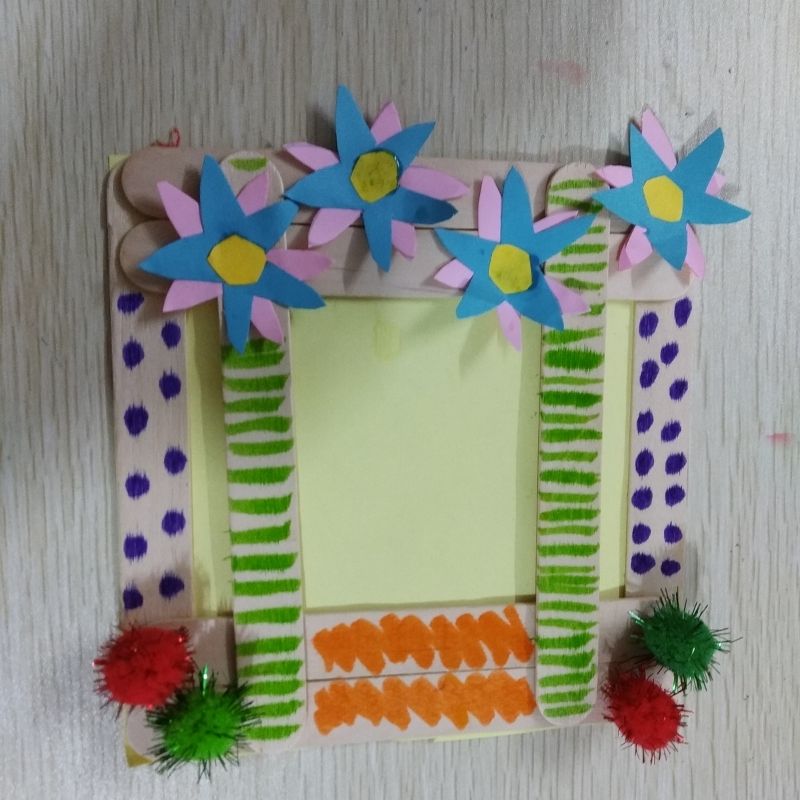
- Next, stick the flowers in a zig-zag pattern on one side of the photo frame vertically.
- You can also stick pairs of pom pom balls on the other ends to make it look creative.
- Later colour the popsicle stick framework using sketch pens to make it look more appealing.
- That’s it, children, you have your photo frame ready.
- The portion in the middle would serve as space for the photo to hold and stick in the photo frame.
- Once you stick the photo frame you can cover that portion using a transparent, plastic sheet to give it a glossy or a photo frame effect.


Be the first one to comment on this story.